Dr Simon Lee looks at what to do with your hard earned deer pelts.
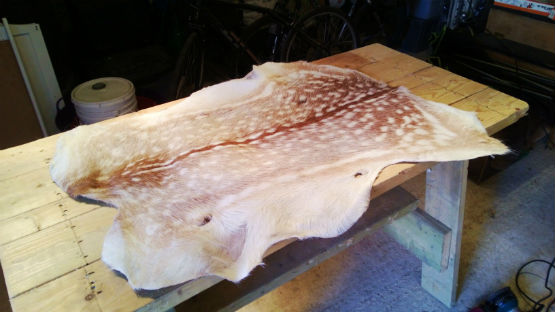
(Above: If treated properly Deer hides can prove to be extremely attractive)
In the first of two parts, I explore the ancient art of preserving hides with modern easy to use chemicals. For this purpose I have chosen a product called K-Tan, available from ‘Snowdonia Supplies’, one kit will be enough for approximately three large skins, obviously this varies from animal to animal but I recently managed to treat three roe and two fallow with one kit.
Initially, like most astro-physicists, you will need some time and space, and also a bit of privacy, the post mortem gralloch is better conducted away from prying and occasionally disapproving eyes, and the same applies with skinning and tanning, like gralloching most of the public likes the idea of a steak but not how it got there, most people are either fascinated or horrified by fur, most people however, are magnetically attracted to the tactile and aesthetic aspect of a well treated pelt.
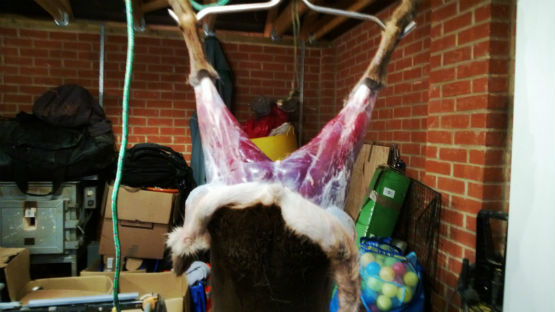
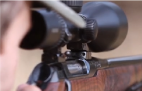
(Above: First of all the skinning)
Inside the kit from Snowdonia, (these retail for around £30 and consist of all you need to treat a few pelts) there will be, a small vial of oil, a bag of white granules, a bag of blue powder, and a bag of white powder, and full instructions with diagrams. Aftercare with K-tan is good, should you run into difficulties or have any questions, the staff at ‘Snowdonia Supplies’ are happy to help.
Next you will need a table or bench that can be used for messy tasks and a frame to stretch the skin over. This will depend on the size of the skin and should ideally have a 15-20cm overlap. I made a bench for this purpose from two discarded pallets and a handful of nails, this should be, for the sake of your back, about 90cms high and sturdy enough to not wobble during vigorous scraping!
Also in the tool bag should be a few large paintbrushes, some empty containers with screw top lids for mixing chemicals and a scraper. The scraper is a key tool here, I have ruined a few knives scraping hides and have found the best tool for the job is a flexible curved steel cabinet scraper, packs of three are available on the internet for about a ‘tenner’.
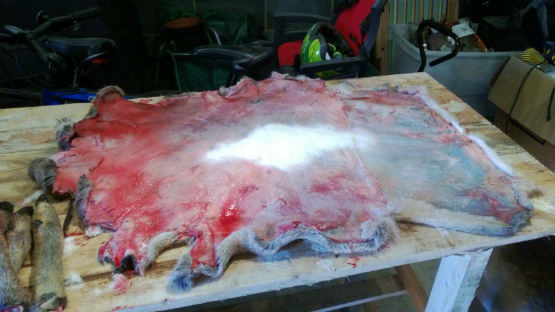
(Above: Salt is applied to the flesh side of the pelt)
Waiting in the wings should be disposable gloves, aprons and facemasks, a scalpel with curved blade, a large 25litre bucket, some washing powder, a 1 kg bag of cooking salt, some clean 2 litre milk containers with screw top lids, and a rotary sander with coarse sanding discs.
Now the process can begin, I tend to be a bit circumspect with all matters deer, as every set of neighbours contains one 'net curtain twitcher', good relations need to be constantly worked at, I am fully aware that we each act as ambassadors for our sport/occupation and no amount of free steaks can repair damage from sloppy operations perceived by the largely unschooled general public.
So there you are, deer gralloched, and carcass hanging up, in best practice style, with everything draining out with gravity's help into a bucket. At this stage I usually get the edge back on the knife and the kettle on, after all, it's highly unlikely your deer will run off!
The name of the game is now to remove as much skin as possible in one piece, I start by slitting up the back legs from the main gralloch cut at the groin and around the tail/rectum area, each leg is then peeled back and down, see picture, to the back.
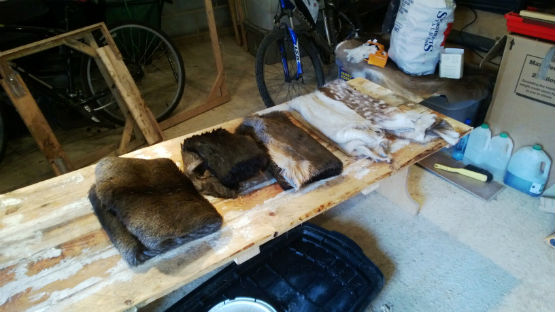
(Above: Fold in the flesh sides to create a neat bundle)
At this stage a good firm pull will remove the pelt to around the shoulders, any knife cuts at this stage should be neat and small to assist the removal of the skin from the white subcutaenous layer.
After two more cuts from the main gralloch cut to the fore leg, a circular cut high on the neck sees the pelt off in one piece. Unless you want to go completely old school and have a Victorian tiger style rug with ears and face, off comes the head. A friend returning recently from Africa had his hard won Burchells Zebra skin returned to him completely skinned from tail to eyelashes, a thorough job?... Yes. Touch much?...Possibly.
Back to the task, you will need to lay out the pelt on your bench and apply the salt to all of the flesh side right into the corners. A good layer of salt will start to melt off any remaining flesh and make it easier to remove, fold the flesh sides inwards together and make a neat bundle and leave overnight. The bench should be slightly angled as liquid tends to run off, a large plastic storage box lid will do equally well.
That's day one over. The remaining stripped carcass can be taken to the butchers or jointed and dealt with at home.
For those who like to stockpile a few skins to treat in a batch, they can be frozen in a deep freezer until you are ready, personally I like to salt them first to aid preservation and bag them up in plastic to avoid any unnecessary mess.
Overnight the skins will have started to yield much of their moisture into the salt, stopping the natural process of deterioration. After two to three days like this, the skins being turned over every day, the initial stage is complete.
With tanning, size of animal, type of animal and seasonal pelage are all factors, a winter pelts will be thicker than a summer, and a park fallow in mid Summer will invariably have a thinner hide than a huge Red Stag in winter.
After the initial salting, comes fleshing, with apron and gloves on, starting from the tail end, with the scraper blade at 90 degrees to the flesh side. A smooth scrape over the whole surface will remove the salt, membrane, and any patches of flesh left on the pelt, doing a thorough job here will help greatly in the following stages and make a nice cleanly even skin.
The leavings are swept into the bin, and the next phase can begin. The pelt now needs to be washed, first in cold water to remove salt and bloodstains, then with hot water having first sprinkled the whole flesh side with washing powder and getting a lather going.
Any thorns and other foreign bodes will be rinsed out of the pelt, added to which I frequently find drowned 'keds' in the bucket despite extensive scrutiny and three days in the salt, if they can persist so can deer ticks and all the problems they can cause, so be careful and keep the gloves on!
After plunging the pelt up and down in very hot water the pelt needs to be rinsed thoroughly a few times in cold water to remove any remaining soap, and left to drain off. At this point you will be able to clearly see the entry and exit wounds in the pelt, unless you have been using too much gun, these won't be too visible from the fur side, but can be patched if required.
Not wishing to ignite passions about head and neck shooting, I don't advocate any particular point of aim, but a high neck/head shot will leave the main pelt untouched, enough said.
In the next part of this article we cover treatment and finishing of your skins.
In the mean time, to read more from Dr Simon Lee follow this link: how-to-make-venison-jerky